Layered Wedding Invitations: All About Adhesives

You’ve spent some serious change on wedding invitation printing. They’re beautiful! Maybe you want to add a backing layer to add some pizzazz, or perhaps you want to paste them on an enclosure. I’m willing to bet you don’t want to ruin them with the wrong adhesive. Read on for some very important tips that will help save you some tears and money.

Invitation Adhesive Don’ts
I can’t stress enough how important it is not to use anything water-based to adhere your invitations. In other words, NO GLUE! You don’t want anything that will be messy or will cause ripples on your gorgeous invitations. I also don’t recommend glue dots unless they are flat. The ones that are more tape-like are fine, but any glue dot that is raised at all will leave you with a bumpy effect that you don’t want. However, keep in mind that you want whatever you use to adhere them to be around the entire edge of the piece to avoid gaps. With glue dots, this could take a lot of product and a lot of time.

Lastly, do not use spray mount. I love the stuff, but if you’ve ever used it, you know it can be messy, and can often leave a film or residue on everything in a several feet radius, including your precious invitations.

Invitation Adhesive Do’s
To adhere your invitations to a backing layer or enclosure in a flat/non bumpy, secure way, I recommend two products:

Scotch Brand Double-Sided Tape

This tape is both flat and secure—once it is adhered it is not going anywhere. It won’t add any texture/bumpiness like glue dots, and it won’t ripple or ruin your invitations like water. There is no mess or residue left like spray mount.

To adhere, just apply the tape in four pieces all around the edge of the invitation and follow instructions below.

Scotch Brand Tape Roller

If you have a lot of invitations, it may be worth it to invest in the Scotch Brand Tape Roller. It gives the same nice effect as the double-sided tape above, but can make the process a lot quicker.

To adhere, just roll the tape around all four sides of the back of the invitation and follow instructions below.

Instructions for Adhering Invitations to Backs
Whether using double-sided tape or a tape roller, once you have your adhesive on all four sides of your invitation, hold it slightly above the backing layer and center it by sight (while still holding it in the air above the backing layer). Once you are satisfied it is positioned so the border looks even on all sides (I recommend invitations be sized .375″ smaller than your backs), press down and smoothe. Keep in mind, this is usually a one shot deal. It will likely ruin the invitation to pull it off and redo. That can be daunting, and you may need to practice a bit, but once you have gotten it down it really is fairly easy if you have a steady hand and a good eye.

Please note, the border on your layered invitation will never be 100% even— but don’t get crazy about it. I can assure you your guests will not be bringing out their ruler to check, and will likely never notice. Another thing to note, the larger your border (the greater the difference in size between the two pieces) the less noticeable a slightly off-center invitation will be. In other words, if your invitations aren’t centered perfectly on the backing layer, an 1/8″ border will be more obvious than a 1/4 inch border.

Free Printable: Wedding Postponement Announcement

The global pandemic continues to be a tough road for everyone. For engaged couples, who have been faced with having to postpone their weddings, it has been heartbreaking. In an effort to help, I have created the following simple announcement for download. It reads:

“To Our Dear Family & Friends. In light of the current global pandemic and social distancing recommendations, we have made the difficult decision to postpone our wedding. We look forward to celebrating with you in the future. An invitation will follow with our new wedding date. With love.”

The file is not editable however the space at the bottom has been left blank for the couple’s signatures.

rc55x425CO

This announcement can be printed at home or professionally, it can be used electronically via email or text, or it can be uploaded to your wedding website. The dimensions are 5.5″ x 4.25″ and when printed it fits an A2 envelope.

The following versions are available. Click on the links to download:

Single PDF

Single JPEG

Single PDF with crop marks

4 per page (8.5×11) PDF with crop marks

♥ Eden

PS – For some practical advice on wedding postponements, go to my previous post, “How to Cope With a Wedding Postponement.


How to Cope With a Wedding Postponement

You cannot believe your luck. You’re all set to celebrate your big day with your closest family and friends and then BAM! Pandemic. I mean, who could have predicted THIS? It stinks. Plain and simple. No one wants to reschedule a wedding, something they have looked forward to and have been planning for for months. Read on for some practical advice on navigating this ordeal with grace.

Feel Free to Wallow

Yes, you and your loved ones are healthy and you have a roof over your head and plenty of TP. But that doesn’t mean you’re petty for being disappointed a virus caused you to change your carefully orchestrated wedding plans.

A wedding is arguably one of the biggest occasions of our lives. Most people’s wedding days go off with just a few hitches but overall pretty swimmingly. Even rain can be turned into memorable stories and great pictures. But this is different. And you have a right to be sad, or mad, or angry.  In a 2018 Brides Magazine article titled “What to Do When Natural Disaster (Like Hurricane Florence) Affects Your Wedding,” Mental Health Counselor Jody E. Smith, LPC, NCC, says, “The key is to not beat yourself up…for being upset or disappointed…it is 100 percent OK to mourn the loss of your wedding.”

Some things to do when you feel upset:

  • Go to planning sites like theknot.com and commiserate with other brides who are going through the same thing. Sometimes you just need to talk to people who get it.
  • Google any disaster (9/11, the Thailand Tsunami, Hurricane Katrina) and “weddings,” and you’ll eventually find stories of other brides who went through a similar experience as you are going through now. I recently read on a forum about a bride whose Caribbean wedding was scheduled for September 15, just four days after 9/11. No one was flying at that time and the couple had to scramble to plan a stateside ceremony instead. By hearing others’ stories, you may gain comfort knowing things like this have happened before.
  • Remind yourself that just because your wedding is being postponed, you will still be getting married to the love of your life. It won’t be the same day, or maybe even the same venue, but you will get married.

If Invitations or Save the Dates Have Been Mailed

Email or mail out postponement notices. Let folks know that when the world is ready, you will be celebrating.

Example wording for a wedding postponement:

“In light of the current global pandemic and social distancing recommendations, we have made the difficult decision to postpone our wedding. We look forward to celebrating with you in the future. An invitation will follow with our new wedding date.

With love,

(Couple’s Names)”

Contact Vendors

Review what the cancellation policies are for the different vendors you are under contract with and contact them as soon as possible. Be nice! These vendors have likely been canceled on left and right recently and your wedding may very well be one of several postponements they have experienced in a short time. Their livelihoods may have been decimated. Tread lightly and be sensitive.

Contact the travel agent who booked your honeymoon or contact the airline and hotel you have reservations with directly. See what you’ll need to do to reschedule your trip.

Make Online Updates

Update your wedding website with your wedding postponement announcement. Update your registries with a date that’s farther out in the future from your former wedding date.

Continue Planning

You don’t necessarily need a firm date to get things done for your upcoming wedding. Many details like your color scheme, for example, will remain the same. You may have extra time on your hands right now that you didn’t plan on. Find one of the many wedding checklists online and start marking things off your list. Order supplies online so you can make centerpieces, card boxes, table numbers, and other items that you can store for awhile. Purchase parent gifts and bridal party gifts. Shop for favors. Plan your ceremony music and DJ list.

If your wedding was cancelled right before your wedding date, and you actually had most things completed, research what needs to be done in your state to change your name (if that’s something you plan to do), work on thank you notes for gifts received already, or look into excursions for your honeymoon destination.

Look Forward

There are a lot of uncertainties right now but one thing I do know is that life, eventually, will return to (somewhat) normal. It might look a little different, it might be a bit shaky, it might not be the life we knew, but we WILL get through this. And when we do, we will yearn to finally come together after weeks and maybe months of social distancing, and we will want to PARTY.

Remember, your wedding will be special no matter what day it is on and no pandemic can change that. It’s hard for everyone when joyous occasions have to be postponed, but how sweet those times will be when they finally arrive.

♥ Eden


Ode to Acrylic (Table Numbers!)

Did you know you can save BIG BUCKS by NOT personalizing EVERY element of your wedding? Ditch the bride and groom’s names/initials and wedding date, and very specific style and/or colors, and your price for items like table numbers will come WAY down. Makers charge WAY LESS for items that can be created in bulk over ones that are customized just for you. Not only that, but you’ll have a better chance of recouping some of your hard earned money if you can sell your one-time use wedding items after the big day. You can’t do that if they’re etched with your details! Keep some items generic and sell them to another bride on Facebook Marketplace or Craiglist, and make back some of all that cash you spent.

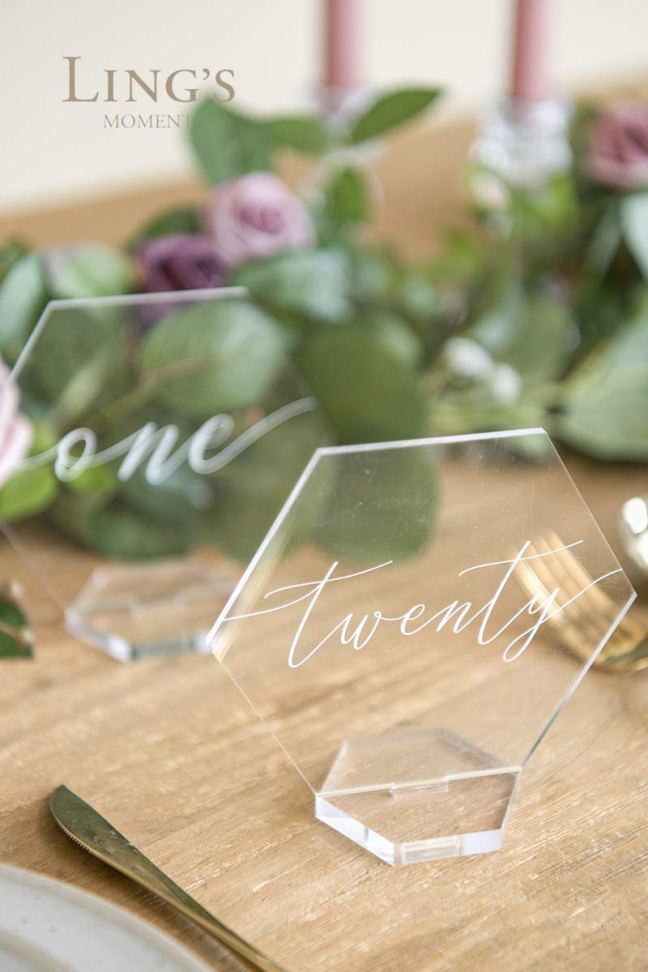
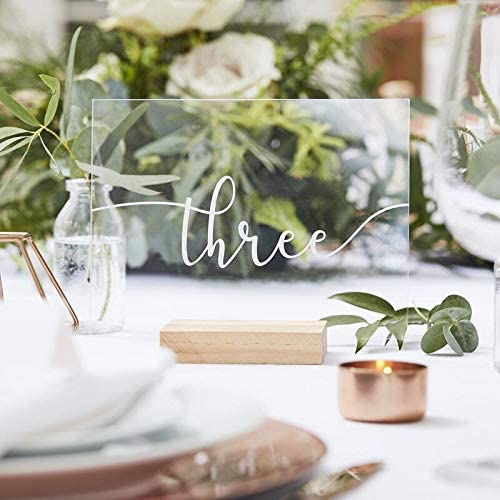
Going generic does not mean you have to skimp on style! The following is a gorgeous collection of non-custom acrylic table numbers found on Amazon. Acrylic continues to be a go-to for brides today and the impact is nothing less than stunning. Enjoy!

♥ Eden

(This post contains affiliate links). 

tablenumber2tablenumber3tablenumber4tablenumber5tablenumber11


When to Ask Guests to Return Wedding RSVPs

I’ve gotten this question a few times recently, as people think ahead to their wedding invitations for their 2016 weddings: When should I ask people to respond by?

Customarily the return date is when your caterer or your venue needs their numbers in by, PLUS some time for you to call people who have not yet responded. MOST websites recommend two to three weeks. I recommend at LEAST three, especially if you are having a big wedding and anticipate having to track down a lot of non-responders.

I also recommend responses be requested by the 1st or the 15th of the month, where possible. I think it’s easier for people to remember to drop an RSVP into the mail that way. In addition, be sure to have the most accurate address list possible BEFORE sending invitations out to save postage and headaches. No matter what you do though, you will have people that don’t respond. It’s frustrating, for sure, and unfortunately part of the stress that is wedding planning!

In the end, you know your guests better than anyone and how responsive they’ll be. Whatever you do, I recommend erring on the side of leaving yourself as much time as possible.

When did you ask for your responses to be in by? Was it to late? Too early?

Winter Wedding Save the Date

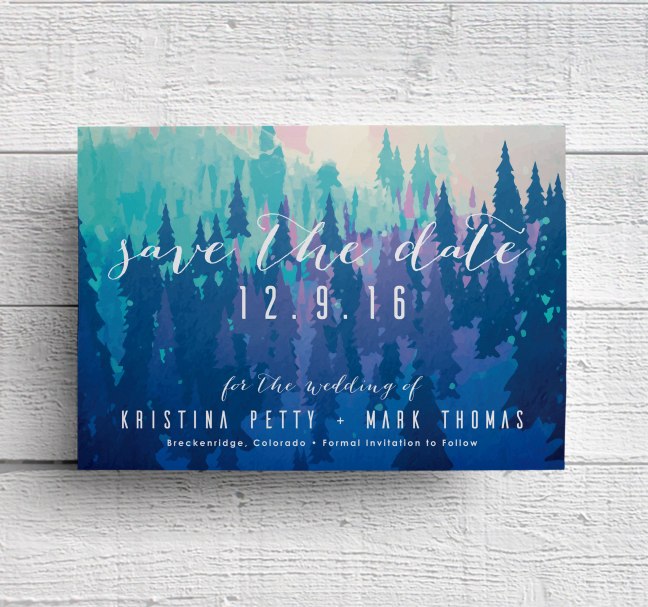
This cold weather has gotten me in the mood for Winter weddings! Here I’ve used a mountain landscape watercolor background to announce the nuptials of Kristin and Mark. It is available as a flat card or postcard. Find it here on edenweddingstudio.com. Enjoy!

Wedding Invitations: What is a backing layer?

Nothing screams luxury more than a thick, stiff invitation. Conversely, invitations that are thin and bend easily send a message of poor quality and may reflect to the invitation recipient that the event will also be sub par. Thick cover stock is one way to achieve a luxurious feel. Another is to add a backing layer to the invitation.

A backing layer is a piece of cardstock adhered to the invitation itself. The backing layer is slightly larger than the invitation so it adds a border to the piece, creating an opportunity for an additional touch of color.

My favorite cardstock to use for a backing layer is Stardream metallic. Their 105 lb. stock can be purchased precut via cutcardstock.com or envelopemall.com, among others. I recommend the backing layer be sized .375″ greater than the invitation itself. For a 5″x7″ standard invitation for example, the backing layer would be 5″x7″ and the invitation would be 4.625″x 6.625″. This will achieve a .1875″ border all around the edge of the invitation.

The invitation pictured above was digitally printed on 100 lb. matte cover stock. It is adhered to a Stardream 105 lb. lapis lazuli (metallic navy blue) backing layer. The accompanying envelopes are Stardream Antique Gold.

The Skinny on Paper Weights

Clients ask me this a lot: what is the best paper weight for my invitations? I recommend 100 lb. cover stock (also called card stock – the terms are interchangeable) or higher (higher means heavier aka thicker). BUT! There are some caveats:

DIY From Your Home Printer
If you’re printing at home with your trusty inkjet printer, check your manual to see what paper weight your printer can withstand. A lot of the basic models can do no more than 100 lb. Some can’t print anything higher than 80 lb. Some can do heavier but only with certain settings. It’s important to check this out before investing in your paper. You don’t want to be printing your invitations at 12 o’clock at night only to discover that the cardstock you bought is jamming your printer like crazy and 200 invitations have to be hand-fed through your machine one by one to get it to work (or worse, it doesn’t work at all).

Professional Printing: Brick & Mortar
Whether you’re printing through Fedex Kinko’s, or a local mom and pop, be sure to check with them first to see what paper weight their machines can handle. 130 lb. cover stock is a very nice weight. But if their machine is going to turn it into origami with accompany choking sounds, it’s good to know that ahead of time.

Professional Printing: Online
This is pretty much a no-brainer, because the printer vendor is only going to offer what they know will work with their equipment. It’s worth it to do some digging on their site (or to place a quick call) to find out what weight paper they use. Sometimes this information is hidden, usually if it’s not anything to brag about. An 80 lb. cover stock is going to bend a lot more than a 130 lb. cover stock. It will also cost less (and then the bargain you thought you were getting on printing may not end up being a bargain at all. In other words, when you’re comparison shopping printers, be sure to factor the weight of the paper to determine the quality you’re getting for the price). The more high-end you want your wedding invitations to feel, the higher the paper weight you should go with.

Add A Backing Layer
If you know ahead of time that you’re going to add a backing layer to your invitations (or if you’re going to adhere your invitation to an enclosure), save yourself some money and stick with 80 lb.cover stock for the invitation. There’s no need for a thick invitation card in this case when the backing layer will more than likely be over 100 lb. itself (the Stardream brand, for example, is 105 lb.), making the total weight of the piece more than substantial enough. Adding a backing layer is also a nice option if your printer will not handle more than an 80 lb. cover stock but your aim is for a thicker invitation. You still may want to use a higher weight cover stock with your inserts (most people do not use backs for inserts) if paper weight is important to you.

Honour vs. Honor and Favor vs. Favour

“The honor of your presence” and “the favor of your reply” are common phrases used in wedding invitations. Depending on what example you’re running across on Pinterest, you may see invitations with “honor” and “favor” spelled “honour” and “favour.” Which version is correct?

Actually, they both are – depending on where you live. Some people incorrectly assume the addition of the “u” makes the invitation fancier, when in actuality it’s just how people from non-U.S., English speaking countries (England, Australia and Canada, to name a few) spell “honor” and “favor.” If you’re American “honor” and “favor” are correct, however, it’s perfectly fine to use the British spelling if you prefer (it’s your wedding after all!), but be sure to be consistent and use the same form with both words. Also, remember, honor (or honour) is technically reserved for those weddings to be held in a church (if your plan is to follow wedding etiquette).

Do me a favour and share this post, would you? I’d be honoured!

Envelope Talk: What’s Standard?

Invitations
MOST invitations are 5″ x 7″, which will fit a standard A7 envelope. This is the easiest envelope to find on the market either online or in store. Another invitation size, although not as common, is 8.5″ x 5.5″, which fits an A8 envelope. A8 envelopes are also called “carrier” envelopes because they are sometimes used as outer envelopes for wedding invitations (with the A7 envelope becoming the “inner” envelope).

Response Cards
MOST people use A1 envelopes for their response cards. The dimensions of the response card itself should be 4.875″ x 3.375″. One nice thing about this size card is it can be printed four per 8.5″ x 11″ page (saves on printing costs). An alternate size for response card envelopes is A2, with the dimensions of the card itself measuring 5.5″ x 4.25″.